
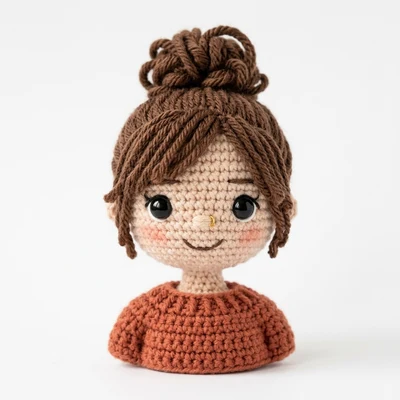
If there is one foundation technique that instantly elevates your crochet projects from looking homemade to beautifully handmade, it is mastering the crochet magic loop (also widely known as the magic ring or magic circle). Whether you are crafting adorable amigurumi plushies, cozy winter beanies, or seamless coasters, this simple adjustable method eliminates that frustrating center hole forever.
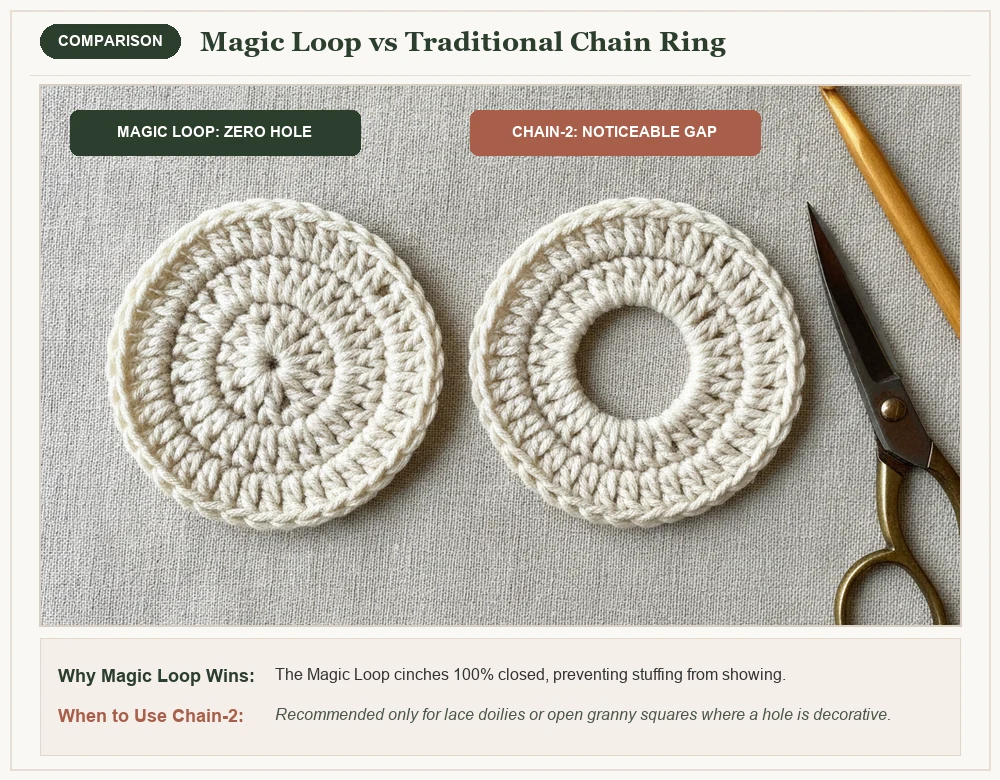
Before discovering this technique, most makers start with the classic “chain 2” method. While traditional rings work for open lace motifs, they leave a visible gap where polyester fiberfill escapes and drafts seep through. That is why both the Craft Yarn Council and the Crochet Guild of America (CGOA) recommend the adjustable loop as the ultimate gold standard for solid round crochet projects.
In this hands-on guide, I will walk you step-by-step through my foolproof 4-step sequence with clear close-up photos and pro tension secrets. Grab your hook, and let’s create a perfect, zero-gap ring together!
Magic Loop vs. Traditional Chain Ring: Quick Comparison
The magic loop works on an adjustable sliding loop principle. Instead of anchoring your initial stitches into a rigid chain knot, you work your stitches over an open, adjustable loop of yarn. Once your first round of stitches is complete, you simply pull the tail end of the yarn—and like magic, the center ring cinches completely shut with zero gap.
| Feature | Crochet Magic Loop (Ring) | Traditional Chain-2 Ring |
|---|---|---|
| Center Hole | 100% Closed & Seamless (Zero Gap) | Leaves a visible 2–5mm hole |
| Adjustability | Fully adjustable to fit any stitch count | Fixed circumference determined by chain count |
| Best Used For | Amigurumi, Beanies, Solid Coasters, Baskets | Lace doilies, Granny squares, Open motifs |
| Learning Curve | Requires a few practice tries to get hand memory | Very simple for complete novices |
Step-by-Step Magic Loop Photo Masterclass
Follow these four simple steps to make an adjustable ring on your first attempt. Hold your yarn relaxed and follow along with each photo:
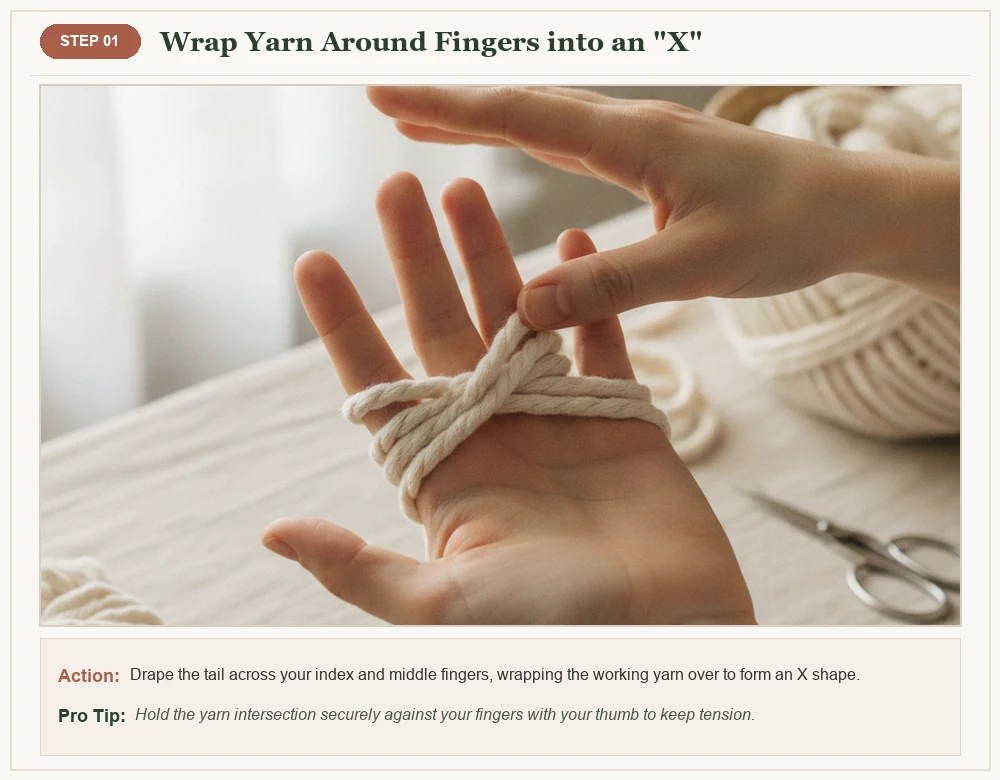
Step 1: Wrap the Yarn in an ‘X’ Shape
Drape the short yarn tail across your open left palm. Wrap the working yarn around your index and middle fingers, crossing over the first strand on top of your fingers to form a distinct “X” shape. Hold the yarn gently with your ring and pinky fingers to maintain steady tension.
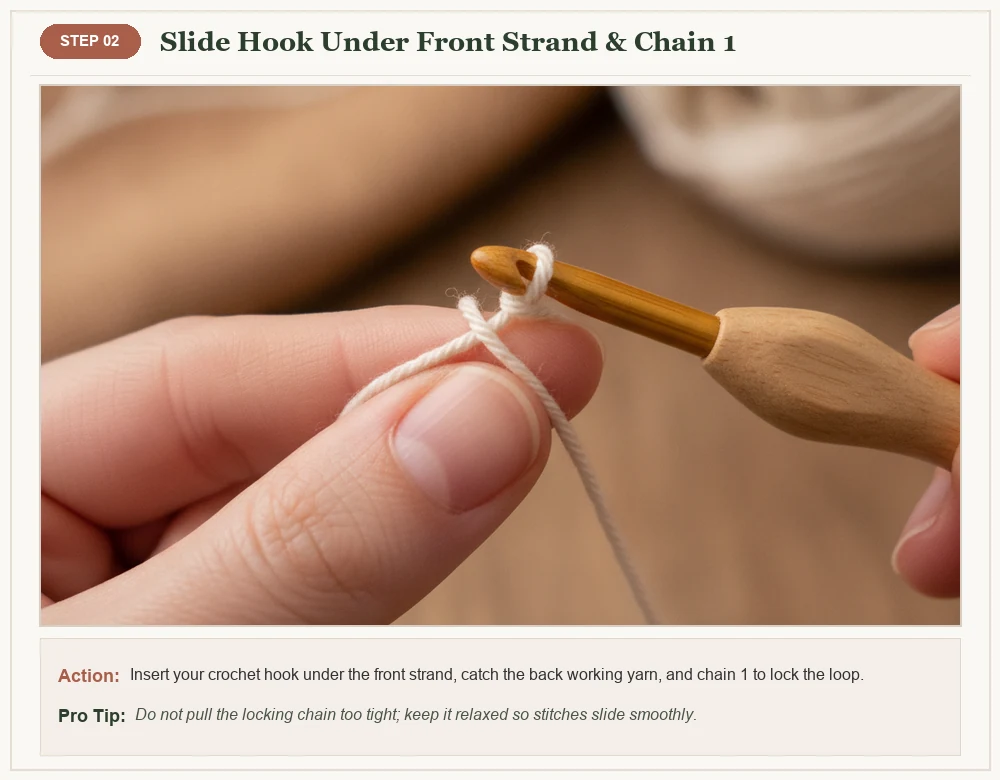
Step 2: Slide Hook Under First Strand & Chain 1
Insert your crochet hook under the bottom-right strand of the “X”. Catch the upper-left working yarn with your hook hook-side down. Pull the yarn under the first strand, rotate your hook upward, yarn over with the working yarn, and pull through to make a Chain 1. This securely anchors the adjustable loop.
Step 3: Work Your Stitches Directly Into the Open Ring
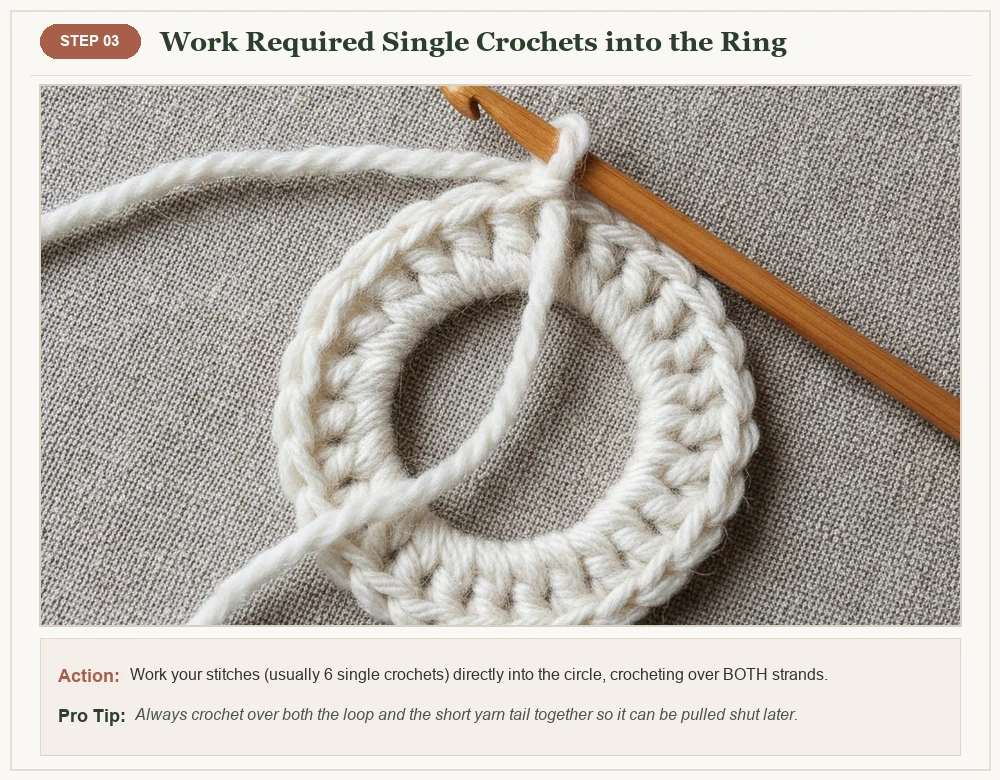
Gently slide the loop off your fingers, holding the circle open with your thumb and middle finger. Work your required number of stitches (typically 6 single crochets for amigurumi or 12 double crochets for granny motifs) directly into the center of the ring, ensuring your hook passes under BOTH the loop strand and the yarn tail.
Step 4: Pull the Yarn Tail to Cinch Completely Closed
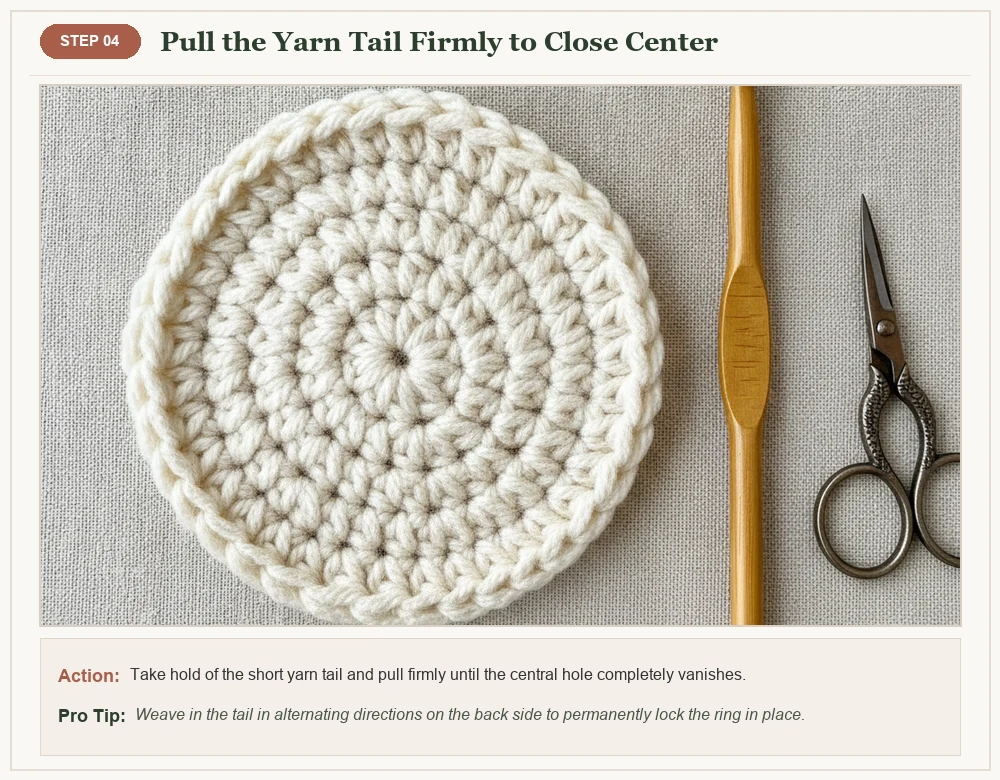
Count your stitches to confirm your starting count. Now take hold of the short yarn tail and pull it gently and firmly. The adjustable ring glides effortlessly together until the center hole completely disappears! Place your stitch marker in the first stitch to begin Round 2.
Essential Tools & Materials to Practice
Setting yourself up with the right supplies prevents yarn splitting and tension frustration. Here is what I recommend for practicing your first magic rings:
- Yarn: Medium Worsted Weight (#4) in a smooth cotton or acrylic blend in a light pastel or cream color (dark yarns make seeing loop strands difficult).
- Crochet Hook: An ergonomic 4.0 mm (US G-6) or 5.0 mm (US H-8) hook with a smooth throat that won’t catch on yarn fibers.
- Notions: A sharp pair of yarn snips, a locking stitch marker to secure your working loop, and a blunt tapestry needle for weaving the tail securely.
Eva’s Pro-Tips for Magic Loop Success
The “Golden Rule” of Magic Loops: Weaving the Tail
Because the magic loop is held together by friction, never just snip the yarn tail short! Over time and multiple washings, a cut tail will work itself free, causing your entire project to unravel from the center. Always thread your tail through a tapestry needle and weave it securely through the base of the stitches on the wrong side in three alternating directions.
Common Magic Loop Mistakes & How to Fix Them
1. The Tail Won’t Pull Closed (It Jams)
Cause: You worked your stitches around only one strand instead of both, or your stitches were pulled too tightly around the ring.
Fix: Unravel back to the chain 1, ensure you crochet over both the circle loop AND the tail, and maintain relaxed, even tension.
2. The Center Re-Opens or Loosens
Cause: The tail was not anchored securely with a needle on the back side.
Fix: Pull the tail snug again and knot it lightly around an inner strand on the wrong side before weaving the end in opposite directions.
Save This Tutorial to Pinterest
Pin this high-resolution craft infographic to your favorite crochet boards on Pinterest so you have a quick visual reminder whenever you start a new circular project:
